Flats, aka Scenery, Walls, Masking for Theater
The Role of Flats in Theatrical Scenery: Creating Illusions on Stage
A stage flat, commonly known as scenery, walls, or masking in theater, is essentially a faux wall. It's a crucial part of scenic design, often requiring multiple flats to construct a full wall.
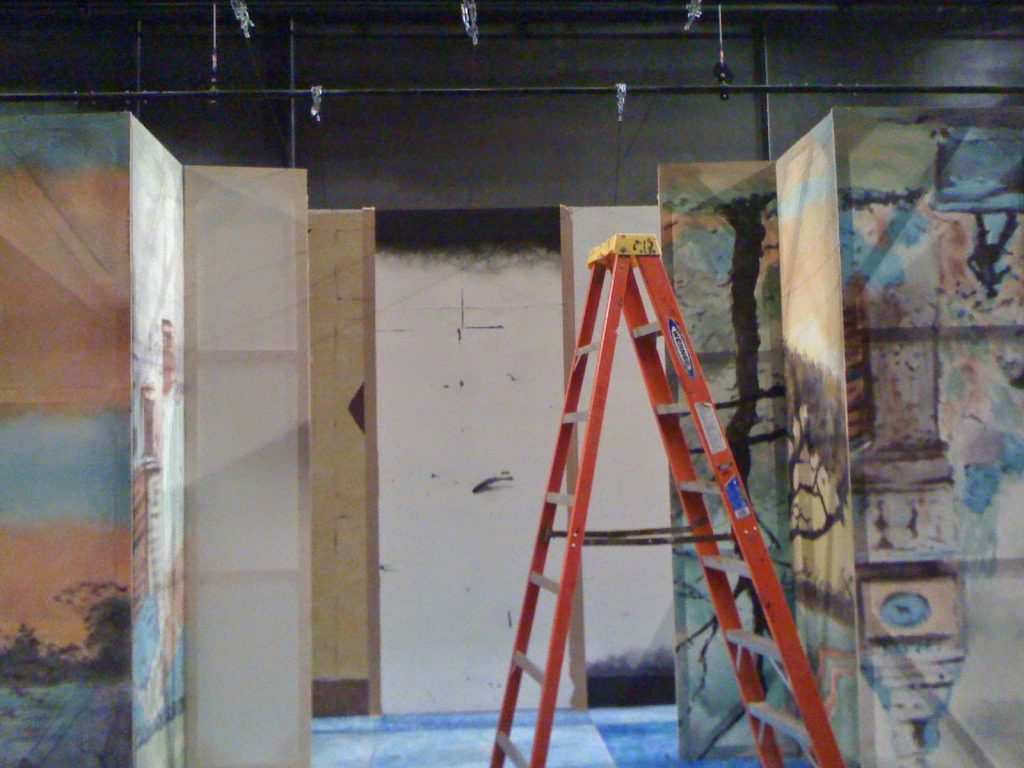 A set of Broadway flats makes a hallway
These flats are assembled to create a comprehensive scenic wall, with specialized flats incorporating doors and windows as needed. The front side of these flats presents a smooth, flat surface, while the rear usually features exposed framing and specific hardware for attachment.

Flats Standard Rear Framing Lashing
Special care is made to align the fronts so the surfaces are as smooth as possible.
What types of Flats are used on Stage?
Stage flats are typically constructed in two primary styles. The traditional soft-covered flats, often used in Broadway-style productions, and the more robust hard-covered flats, also known as TV or Hollywood flats. The latter can be quickly clamped together and are easily screwed or bolted along the framing.
 Hollywood (TV) style stage flats can quickly clamp together. They are easily screwed or bolted together along the "on edge" framing.
How to build a stage flat.
What size is a Stage Flat?
For hard flats covered in thin plywood, aka, Lauan, the most popular size in the USA is four feet wide by eight feet tall (4'x8') to match the size of the standard sheet of plywood. Adding height is easy and usually done in two-foot increments. 4x10, 4x12, and so on.
The size of a stage flat can vary based on your requirements. However, it's essential to consider practical constraints like door sizes when constructing large flats. Broadway and Hollywood flats come in various forms and sizes, with two main types: hard and soft. Hard flats are covered with thin plywood, while soft flats use fabric such as muslin or canvas. Soft flats are lighter and easier to handle but don't mimic hard walls as effectively as plywood-covered flats do.
Broadway stage flats are "framed flat," resembling a picture frame in construction. They require triangular pieces of plywood, known as corner blocks, at the rear side for bracing to keep the corners square. The center toggle is braced with a long narrow strip of ply, termed keystones or straps depending on the shape.
How to build a door flat?
Creating a door flat involves several options based on the type of door needed. A basic door opening or archway starts with two flats for either side of the opening and a small flat (or plug) as the header. This header plug is then attached to both vertical flats using hinges or other flat material. For sliding doors, specific techniques are employed which can be found on dedicated resources. For a sliding door, check out this page.
What book is best for building scenery?
I really like the Stock Scenery Construction Handbook. See my video review here along with a link to the book on Amazon. Stock Scenery Construction Handbook

A team of students is constructing multiple 6’x12′ flats. They've joined three 4x8 foot tables to form a large jig, ensuring the flats are accurately aligned and square. As visible, the corners are secured with clamps. The individual components are measured and marked prior to the application of glue.

We're planning to cover this flat with white scrim. The goal is to create a translucent effect, allowing the audience to see through it. This technique can add an intriguing layer of depth to our production.

To plan the construction of a flat, the first step is to create a blueprint. For a standard 4'x8' frame, we'll use 1x3 lumber laid flat. While the drawing might not show corner blocks and straps, rest assured they are included in the cut list provided on the left side of the board. This ensures we have all the necessary components for the construction process.

A hard covered theatrical flat, similar in framing to the soft flat, provides a more robust wall surface. This type of flat is particularly useful in scenes where actors will be interacting with or brushing against the walls, as it can withstand more contact and pressure.


Flats Custom Shaped Front
A set of flats making a custom shape, front view.

Flats Custom Shaped Rear Framing
Flats Custom Shaped Rear Framing

Flats Custom Shaped Rear Framing and RIgging
Flats Custom Shaped Rear Framing and RIgging

Flats Standard Rear Framing Lashing
Flats Standard Rear Framing Lashing
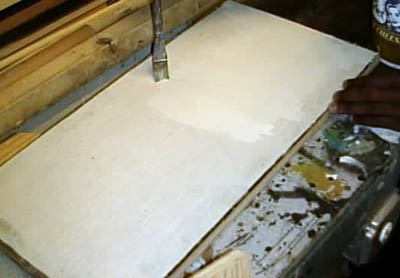
Soft covered theatrical flat. This flat is framed flat and covered with muslin. The framing is usually 1″x3″ pine laid flat, and the joints are held together with keystones and corner blocks. The muslin is glued, stapled and then sized. This photo shows the methods of building a flat.
Take a close look at the edges of the flat on the work table. You'll see boards nailed to the table, forming a jig to hold the framing pieces in place. This allows for quick repeated laying out of the frames.
Speaking of jigs, here's a larger Flat Jig.


|
Components of a Soft Covered Flat 1. Rails: These are the horizontal pieces at the top and bottom of the flat, providing the main structural support. 2. Toggle: This is the central horizontal piece that adds extra support and maintains the flat's shape. 3. Stiles: These are the vertical sides connecting the rails, forming a sturdy frame and helping keep the fabric covering stretched. 4. Corner Blocks: These triangular pieces at each corner secure the joints between the rails and stiles, adding strength and rigidity. 5. Keystone: This long, narrow piece reinforces the toggle, distributing weight evenly across the flat for stability. Each part plays a crucial role in maintaining the flat's integrity, ensuring it is durable and effective for stage use. |
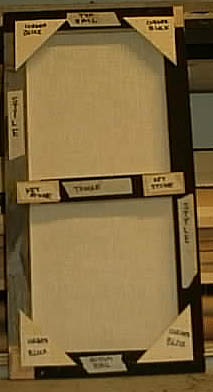 Flat Project Rear Framing with parts labeled |
How do I tighten up muslin? Or, What is Sizing?
Sizing is a powdered substance, mixed with water, and then applied with a brush to the muslin of your flat. Sizing tightens the muslin of your flat while also giving one an impermeable substance so one can paint on it.
Sizing the muslin cover of a flat
What can I use instead of Size?
Instead of size, it is also possible to use watered-down paint. Basically, the way one uses sizing is to take a brush and apply, either the watered-down paint, or the sizing mixed with water, to the muslin and when finished, let it dry.
How to Seam between Stage Flats?
How do I hide the seams between my Flats?
When multiple flats are positioned next to each other to create a larger surface, there will be visible seams where the edges of the flats meet.
To hide these seams, a technique called the Dutchman can be used. This involves applying a strip of fabric over the seam and blending it into the flats to conceal the joint. Here is how to do a Dutchman:
-
Cut a strip of lightweight fabric such as muslin that is 3-5 inches wide. Make it long enough to cover the length of the seam you want to hide.
-
On the flats, paint the area just wider than the Dutchman strip with your base coat of paint. For example, if your strip is 5 inches wide, paint a band about 6 inches wide where the seam is.
-
While the paint is still wet, lay the Dutchman strip down centered over the seam, pressing it smoothly into the wet paint. The paint will soak into the fabric.
-
Use a stiff brush to blend and feather out the edges of the Dutchman strip, stroking from the center outwards. Blend it into the surrounding paint so the transition is smooth.
-
Once dry, paint additional layers of color, texture, or detail as desired. The Dutchman strip will now be seamlessly integrated into the flats.
When done properly, a Dutchman strip conceals the seam between flats for a continuous, unbroken surface. This is an essential scenic painting technique for theater productions. Taking the time to blend the edges makes the seam disappear, creating a more professional looking backdrop.

What is a Hollywood Flat?
A Hollywood flat is a type of theater flat with a rigid wooden frame. Unlike traditional canvas-covered flats, Hollywood flats have a frame made of 1" x 3" lumber positioned on-edge for added durability.
The sturdier frame allows Hollywood flats to be covered in hard materials like lauan plywood or MDF board instead of just fabric. This makes them more rugged for repeated use. To connect Hollywood flats, two toggle latches are screwed into the edges of the frame rather than just one. This helps align and stabilize adjoining flats.
When flying Hollywood flats, drill guide holes through the center of the framing rails and toggles instead of just the rear. Lifting from the middle balances the weight better and prevents the flat from tilting awkwardly. Securing Hollywood flats to the stage floor is easy using double-headed nails. The upper head gives you leverage to quickly pry them up with a crowbar without damaging the floor.
Hollywood flats have a robust hard-shell frame that allows using more durable coverings. The on-edge framing, double toggles, and centered guide holes make them stronger for repeated handling and flying. Overall, Hollywood flats are a sturdier option than typical theater canvas flats.

The joints are held together with pieces of wood called keystones or corner blocks. Corner blocks are used to hold the bottom rail, top rail, and both styles in place. Keystones are used to hold the toggle in place. Corner blocks and keystones are glued and nailed to the framing. Due to the manner in which flats are used, the corner blocks and keystones have to be a certain distance away from the edge of the flat. For hard covered flats, flats covered with plywood (usually 1/4″), the distance from the edge should usually be 1″. For soft covered flat, flats that are covered with muslin., should usually be 3/4″. Corner block and keystones have to be placed a width away from the edge so that flats can be joint together at right angles, and the outside could be even.
Flat Project Rear Framing
Flats are usually made in the proportions of 1:2. The most common flats are 4 feet wide and stand 8 feet tall. They are normally framed with 1″ X 3″ pine laid flat. The actual dimensions of 1″ X 3″ are 3/4″ X 2 1/2″
Hard Covers are usually made from 1/4″ plywood or sometimes 1/8″ plywood. The hard flat offers a sturdy wall surface ideal if actors are going to be brushing against the walls.
Soft covers are usually made from a cloth called muslin. To cover your flat staple muslin to one edge of the flat. Glue the width the frame on that side. Then stretch the muslin to the other end and staple it tight. Do the same to the remaining two sides.
After the muslin had been stretched onto the flat wait for the glue to dry. you can then either cut the excess muslin and leave the staples or remove the staples and cut off all muslin other than that on the surface of the flat.
Some comments & suggestions from our visitors:
Nick Spring, Markville Theatrix tells us: Another facing material can be 1/8″ to 1/4″ thin HDF (AKA FIBREX or Masonite) it provides a very smooth surface for painting (with 2 to 3 coats of a primer or with primer paper already applied) and also for wallpapering if needed. I did a production of Sandy Wilson’s “The Boyfriend” in Sept 1997 to Feb 1998 (rehearsal and show) where we needed a look of a mansion on the French Rivera in the 1920’s. The fiberboard held it quite well with a minimal water soak up and warpage (with strategically placed supports and nails/screws) There was a 24 to 48 hour drying period but can be worked with after 26 hours fairly safely with respect to surface damage. it also works out to be lighter as the board is smaller.
Here we’re using cardboard. We chose cardboard because it would add to the desired wood shingle look we were trying to achieve. Using muslin would have been a lot easier as the cloth would have formed well to the shape of the framing. The cardboard didn’t want to take the curved shape and kept popping the staples. We had to switch to the longest staples we could find.

To get the smoothest surface possible will require using more ribs. Each rib will, most likely, show through the covering.

How to build a flat video.
I found a great series of how-to videos made by James McKernon and posted with his permission. He teaches theatre technology at York University in Toronto, Canada.